oooo, baby, baby

i’m getting back into the studio more and more lately, and as threatened promised, i decided to do some fun sewing in between the mock ups and pattern development.  i had a perfect excuse as my niece was expecting a baby girl early in march.  she arrived on march 4th (by the way, that is also her grandmothers birthday!!) and my first glimpse of her was to be easter sunday.

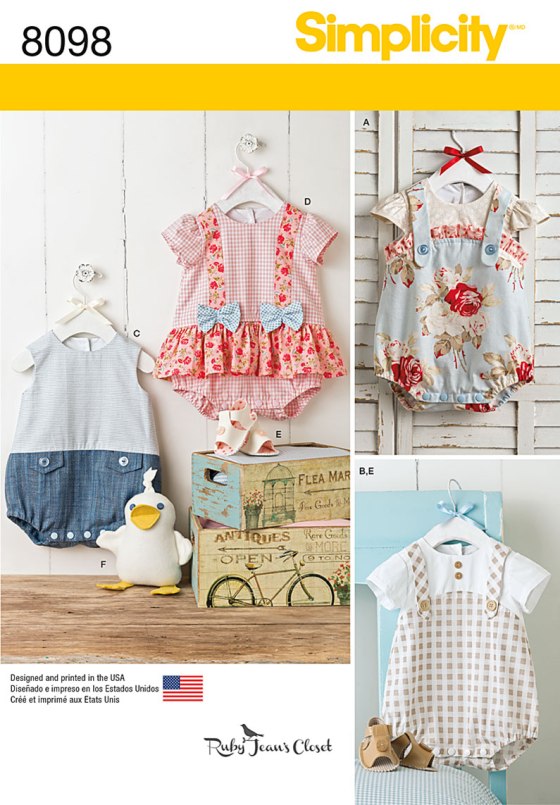
i chose a commercial pattern going with simplicity 8098 because i love every single view, both boy and girl.  it has a vintage sort of feel to it.

8098

then i headed to “the stash”.  my stash is really quite modest, but i found yardage that i had been saving for a ‘small person’ and decided it was just girly enough without being too fru-fru.  it’s a lecien fabric called folk tale by natalie lymer of cinderberry stitches.  it’s probably no longer available (because i like it of course…if i hated it, it would be in every fabric store in the nation!)  i picked up some coordinating fabric for the bodice and ruffle, some pearl snaps and was off.

being used to making full size human clothing, i marveled at the small pieces.  it’s been a while since i’ve sewn for little ones.  but it was a nice change of pace (no bust adjustment!!).

drumroll……….

while i’m not thrilled with the pictures, i was pretty pleased with the romper.

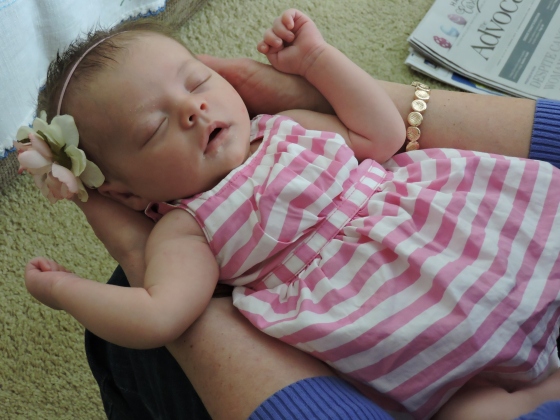
yesterday i met the newest hannah of the family.  since i already have a 4 year old great niece named hannah, i’m calling the new one “double h” (yes, last name begins with h)until i can come up with a better nickname (no one wants to be “big hannah” or “little hannah”…worse yet, “old hannah” and “young hannah”).  she’s a wee bit of a girl, and i never did see her with her eyes open, but she’s beautiful.  i sort of doubt that the romper will fit her until next winter since she’s so small, but you never know!!

DSCN6702

welcome little “double h”….i’ll be here if you ever want a special dress, some warm hand knit socks or some wee little mittens!


keepin the babies warm

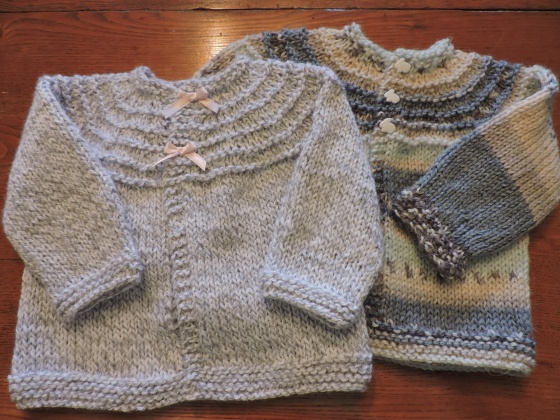
i have 2 babies arriving soon…both girls.  don’t get me started on finding out the sex of babies before their birth…let’s just say if god wanted us to know, we’d be pregnant on the outside!!  i must admit that i knew my third boy was a boy early on, but it was an accidental discovery.  as my doctor was explaining his ‘strange’ position i recognized a “certain part” that gave it away.  anyhoo….2 wee girls will soon join the family and i decided that it was my job to keep them warm and cozy.  thus…baby sweaters.  gotta love knitting baby sweaters…the yarn is soft and pretty….and it’s not a huge time commitment.  before you have a chance to be bored with the project, it’s done!!

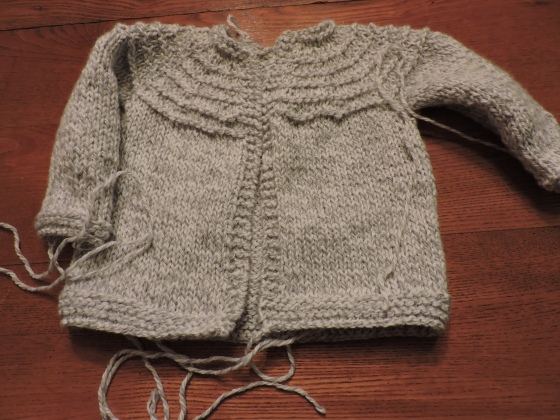
DSCN6591

the tweedy grey one before weaving in the ends.

DSCN6609

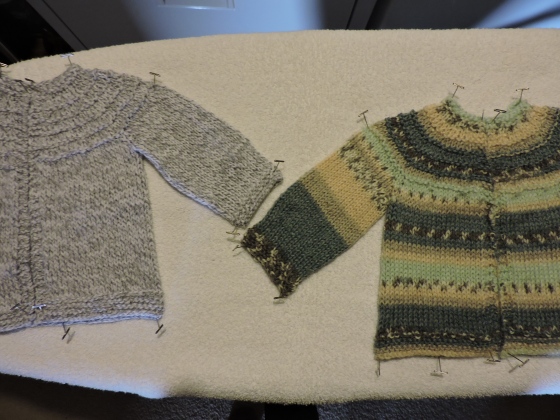
they joined each other for a quick dip with a bit of “soak”.

DSCN6613

a little blocking and it’s on to the fun of buttons!

i tried a few combinations…white pearl buttons, plain pink, plain white, pink bunnies, white bunnies, pink bows…and finally decided that i loved the little pink bows on the grey one and the white bunnies on the scandinavian.

DSCN6624

and they’re ready for wrapping!!  the grey is going to my niece and the scandinavian to my cousin.  now i’m thinking that i may need to make some socks for those tiny little feet.

kim

Uncle Sam-style Blank Slate Patterns Basic Blazer

Does anyone else get just a little bit paralyzed with all of the costume possibilities for a baby or toddler? I am one of those people who gets a little overwhelmed by Chinese restaurant menus that are 10 pages long, so when it came to Jack’s first Halloween a few years ago… well… it went something like this. “He would be the most adorable little Han Solo! But he could be a little lion! But what about a scarecrow! Or one of the hobbits! ….”

I finally decided that I had to narrow it down somehow, so he has been something related to his name every year: a jack-o-lantern at 11 months, a Jack in the box at 23 months and a Jack of all trades this year.

image

I decided to continue the practice this year for Samuel, so I put together a little Uncle Sam outfit for him using Blank Slate Patterns’ Basic Blazer.*

image

He was not super impressed the night of the Fall Festival at church and is crying in the only semi-decent picture I got of the whole costume (I made a red bow tie out and white beard out of fleece that clipped to his shirt collar), so we had a photo shoot last week in our bedded-down garden (because: STRAW!!).

image

The jacket is made out of polar fleece with a red striped cotton lining. I’m wishing I would have interfaced the collar pieces since the cotton tends to bunch up a bit (I was in a hurry (surprise) and didn’t have interfacing handy at the time). I think next time I make this jacket I may play with the shape of the collar a bit since it’s fairly thin in the back and wants to stand up instead of rolling over (perhaps the lining facing needs to be just a smidgen bigger than the main fabric to give it enough room to roll? Or it may have just been the thickness of the fleece that was the problem), but I love the look of the jacket and want to make more.

I chose fleece more for warmth than fashion, but it actually works really well for this pattern. The shape of the jacket is crisp enough to still look suit-y while being more comfortable than a suiting fabric would have been.

image

To complete the look I printed an “I Want You!” logo, cut it in a circle, and glued it to cardboard and a pin back.

image

Lovely pattern, Melissa!

Our interview with Melissa is here if you’d like to read it.

-Elizabeth

* I purchased the pattern and was not compensated in any way for this review. 

A sweet, nautical bapron

I am in another baby season of my life. We had a baby shower for some friends of mine from grad school to attend last weekend; I am hosting a baby shower for a couple who adopted a baby girl this weekend, and I will be hosting a dear friend’s baby shower this summer. I was getting bored with my usual shower gifts (a book, burp cloths and an easy baby quilt or blanket), so I decided to try something different.

image

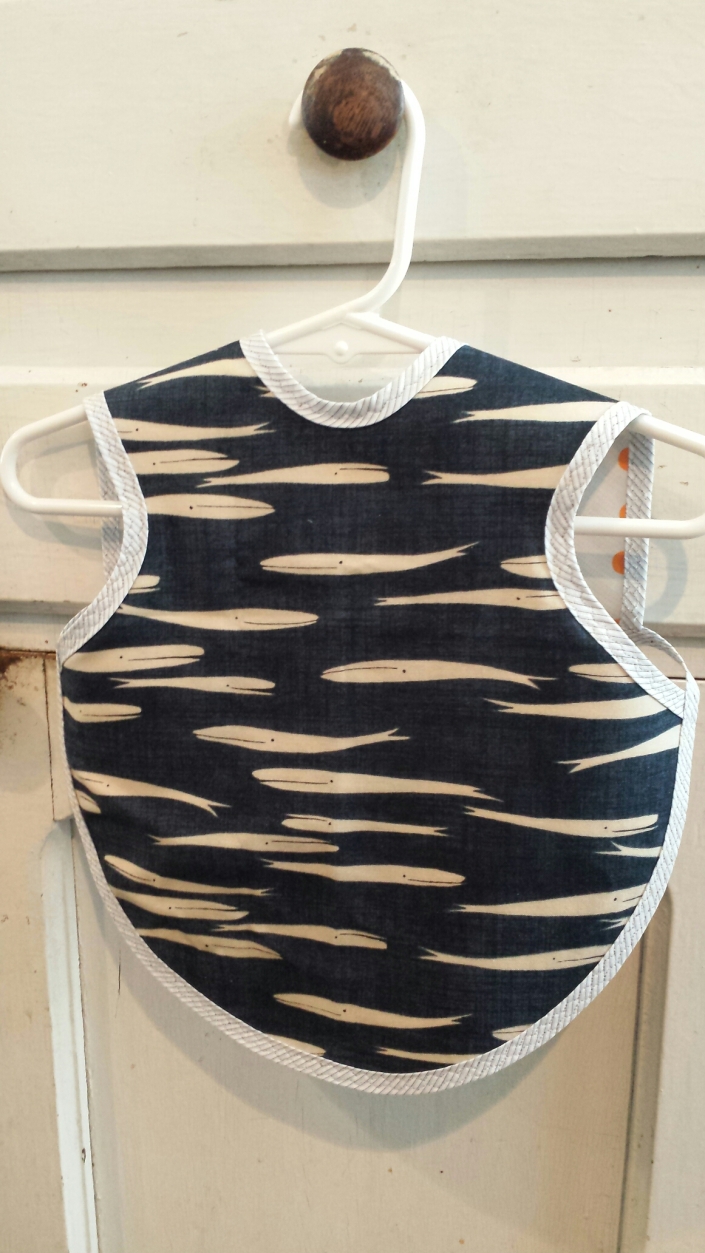
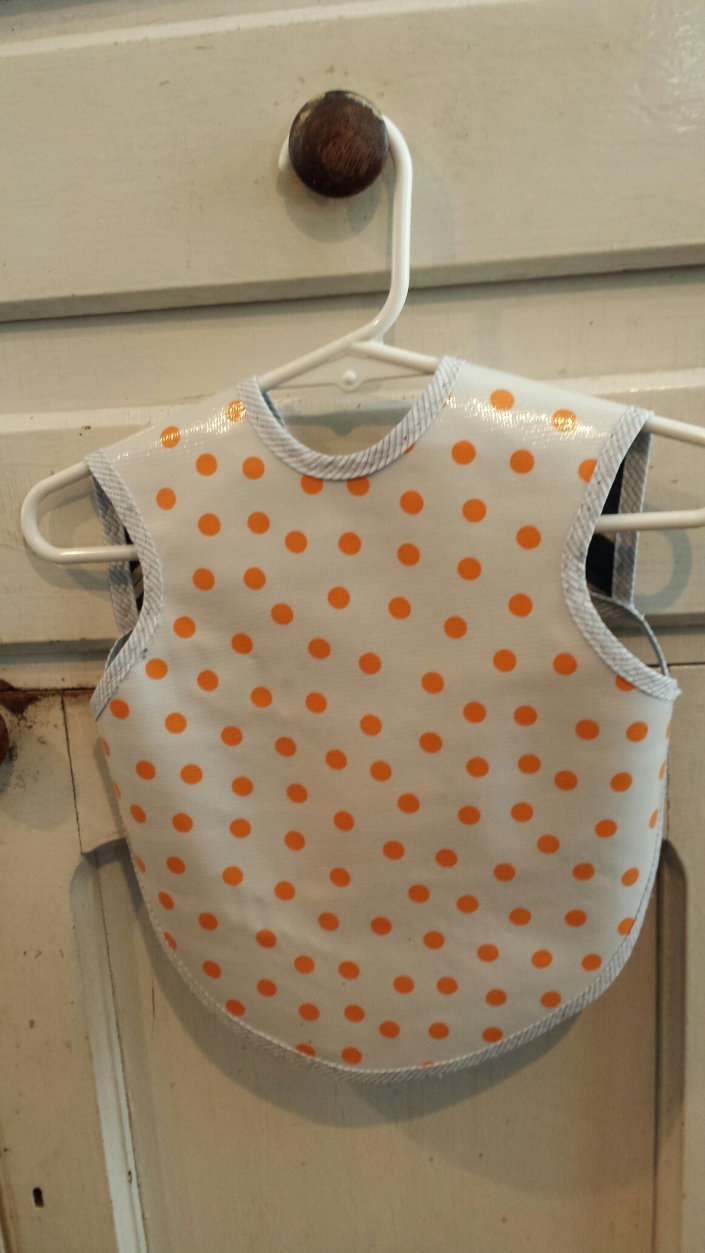
Jess at Craftiness is Not Optional has an adorable pattern for a “bapron” (baby apron) that I have been coveting for my own kids, so I bought it last week and whipped one up for the shower last weekend. It went together quickly and it’s super cute. The whale fabric is by Janet Clare for Moda and I lined it with more of the oil cloth I used for Jack’s chair so it’s reversible and wipeable on that side.

image

I highly recommend the pattern if you need some serious coverage for your kiddo or if you are looking for something cute and practical for a shower. I want to make one in every color. The pattern is available here.

What are your best baby shower gifts? I need more ideas for all these babies!

Baby quilt wrap-up

I just got Samuel’s newborn portrait on his quilt wearing his (too big) romper, so I thought I’d share and show you where the baby quilts ended up since I spent so much time talking about them in the last couple of months.

Samuel's newborn portrait


Of course the boy quilt belongs to Samuel now.  It will be a play mat for the time being and then when he’s ready to move to the crib (he’s in a bassinet in our room now) it will keep him cozy this winter and for many years to come.

As we announced last week, the girl quilt went to Regina, who was kind enough to share pictures of it being enjoyed by her beautiful family.

mehubbyValeriekidsblanket

What a pleasure to meet such nice people and share some love!

The very first quilt I ever made is still in use in our house and in fact, just got promoted two nights ago to official bedspread!

20140804_215406

Jack “graduated” to a big boy bed this week and he’s pretty excited about it.  I’m not at all used to him being able to get himself up in the morning (in fact, the first morning I opened my eyes to a bright-eyed toddler two inches from my nose, which was a little surprising for 6:30am), but it’s working well for him.  Now to teach him to put himself down for a nap….

-Elizabeth


And the winner is…

Oh my goodness, you guys, thank you so much for all of the well-wishes on our new little bundle.  I have loved reading all of the comments here and on Facebook and I wish I had all the time and money in the world so I could give every single one of you a quilt.

I put all of your names in a hat and let Jack pick the lucky winner.  He chose Regina DeCapite, who wrote “My favorite blanket is a pink seersucker receiving blanket that was given to my now 26 year old daughter as a baby. She carried it everywhere and named it ‘uh oh.’ Whenever she would drop it, she would say ‘uh oh.’ Still have it. Congratulations on your newest family member. Adorable!”

My favorite blanket as a little kid was the ugliest white printed receiving blanket imaginable.  It has a satin binding that my mom replaced multiple times after I loved it to tatters and we called it my “other blankie” because my parents would try to offer me any of the gorgeous afghans my grandma and great aunts crocheted for my, but I only wanted my “OTHER blankie”.

Congratulations, Regina!  If you would email me your address at ohsnapdragonstudios[at]gmail.com I’ll send your quilt to you!

Thank you again, everyone!  Samuel has been warmly welcomed into the world.

20140727_085244


So here’s a gratuitous baby picture of Samuel’s first visit to River Road Coffeehouse to wrap up today’s post (two babies for the price of one!).  Also, some shameless promotion – see that snazzy Market Day Tunic I’ve accessorized with those delicious babies?  In case you didn’t see our announcement on Facebook, printed patterns are finally available in our Etsy shop!  If you have already made one of our patterns, we would love to see a picture and have the link to your blog if you’ve blogged it so that we can share your creations!

~Elizabeth


He’s here!

And, just like that, Paul and I no longer outnumber our progeny.  Samuel Atticus was born over the weekend after a short, fairly easy labor and we are over the moon excited to welcome him into our family.

20140720_065206Jack is settling into being a big brother, alternately showing us that he’s a big boy and self-sufficient at 20 months (and man, does he feel big compared to holding our 8ish pound newborn) and wanting to be cuddled and snuggled like the baby he still is.  He learned to say Samuel while he was on the way to visit us in the hospital (“Sam-ool!”) and I died a little from the sweetness.

20140719_170734Paul is tickled pink (blue?) to be a papa to two little boys.  (Two little boys who will not hold still long enough to get a picture together, I might add.)

20140722_072627So, after 9 months of speculation, that’s a small mystery solved and marks the opening of our quilt giveaway!  We’ll be offering the “girl” quilt (Cluck Cluck Sew‘s Scout pattern) to one of our readers.

100_1915 editedAll you need to do to enter is to follow us on Facebook, follow the blog (enter your email address in the sidebar) and leave a comment on this post telling us about your very favorite blanket ever.  We will choose a winner at random on Monday the 28th.

Good luck to all of you, and welcome to the world, baby Samuel!

-Elizabeth

*The giveaway is now closed. Congratulations to Regina!*

Pinafore Dress for a little girl

When I started thinking about what I wanted to make for our baby, I knew right away that I would make a pinafore dress with a sweet little pair of bloomers to peek out underneath in case we have a little girl.  I’ve seen pinafore dresses (or apron dresses, or cross-over dresses) around, and I know it’s an old style, but I had no luck finding a pattern that was small enough – most of the ones I found started at 6 months.  (This one from Owly Baby (link goes to Pink Chalk Fabrics) was the closest to my “vision” that I found, but it starts at 6 month size and without a front view I wasn’t quite ready to pull the trigger.)  Other similar patterns are the Criss Cross Dress from Smashed Peas and Carrots (starts at 6 month size) and the Criss Cross Dress from Melly Sews (3-6 month size, but the straps come up from the front and cross to the back instead of wrapping around back to front as I wanted.  After hemming and hawing for way too long, I decided to start with the Melly Sews pattern (which she offers for free on her blog with a subscription to her email notifications) and adapt from there.

100_1917 cropped and edited


Here’s what I came up with.

Download the (very quickly hand-drawn and scanned) PDF pattern here (prints on 5 pages) and assemble it:

Pinafore dress 3-6 month size July 2014

You’ll need:

2/3 yd fabric (I used chambray, but this would be cute in any soft cotton)

2/3 yd lining (can be the same as your fabric or a contrasting printed cotton to make it reversible)

2 buttons (or 4 if you’re making the dress reversible)

20140717_143330

I didn’t photograph the steps as I was making it, but it’s really simple.

There’s only one pattern piece: cut it on the fold from the fashion fabric and from your lining fabric.  You can make this reversible, but I chose to self-line it because the Robert Kaufman chambray I used will be so nice and soft against baby’s skin.

Put your fabric and lining right sides together and sew all the way around, stopping and backstitching about 3″ before you reach your starting point.

Clip the curves in your seam allowance so that it will lay nicely when you turn the garment right side out.

Turn right side out through the opening you left.  A chopstick or turning tool makes turning the straps easier.

Press the garment, turning the seam allowance of your opening to the inside.

Slipstitch the opening closed and topstitch all the way around the edge if you wish.  (I skipped topstitching, but the benefit of doing it is that you’ll have a nice crisp edge and the dress won’t get quite so tangled up in the wash.)

Stitch buttonholes in the ends of the straps according to your button size following the instructions in your sewing machine manual.

Stitch on your buttons at the ‘X’s.  (Keep in mind that you will need buttons on both the inside and ouside if you are making the dress reversible.)

That’s it!

I used Melly Sews’ bloomer pattern with the only change being that I pinked the edges of the ruffles instead of finishing them and I sewed them on in a wave instead of straight across.

So that wraps up the baby sewing at least until we find out what sort of tiny human will be wearing the things I make.  If we don’t have a girl, I really hope a friend does soon, because this dress and those little bloomers are too stinkin’ cute to be packed away for long.

If you have some baby sewing to do and you missed the tutorial on adding a belt and cuffs to a romper, it’s here.

100_1917 edited


Now we’re just waiting on a baby to wear them!  Don’t forget to watch for the quilt giveaway – my midwife says I could go into labor any minute!  🙂

-Elizabeth

How to add cuffs and a belt to an infant romper

I posted last week about the little boy’s outfit I made and I promised a tutorial about how I added the belt and cuffs to My Taylor Made’s romper pattern.  I’ll apologize in advance for the incredibly uneven lighting – the day I photographed this it was overcast and raining one minute, bright and sunny the next and I lacked the enthusiasm to either get out a better lighting set-up or edit the photos more than the bare minimum.  Jack was also “helping” me with these projects, so there are some errant toddler hands here and there.  Hopefully these are enough to give you some idea of how to go about modifying a pattern, though.  My brain is a little fried, so this might be about as clear as mud, but feel free to leave questions in the comments and I’ll try to respond quickly!

100_1902 edited

First I decided what size I wanted the belt to be.  I wanted the belt to end as little tabs in front with working buttons so that I can add extra buttons toward the middle if the waist needs to be cinched in more, so I measured 2″ in from the side seam, around the back, and 2″ around to the front again.  That was the finished length I wanted, so I added 1″ to my length to account for seam allowance.  I wanted it to be about 1″ wide finished, so I cut it 2″ wide, again to allow for seam allowance.  For the 3-6 month size romper I was making it worked out to be about 17″ long and 2″ wide.  (Mine has a seam in the center back because I was using up scraps, but it could easily be cut from one piece of fabric.)  I also wanted the ends to be rounded instead of square, so I folded the belt in half to cut both short ends at once, traced a little dish to get an even curve and cut it.

100_1891 edited

I thought about piping the edges of the belt, but I thought that might be uncomfortable for baby to lay on, so I decided to make the lining a little bigger than the outside fabric so that it would show.  If you want this look, cut your lining fabric 1/4″ bigger on all sides than your outside fabric, following the shape of the curve on the edges.  (At this point, have a heart attack because your toddler got his hands on your rotary cutter and was very close to figuring out how to slide the cover down on it.  Put rotary cutter away, redirect toddler with the snap setter and carry on.)

100_1892edited


I sewed one long side first, just to have a stable edge to work with, then pinned the heck out of the rest of the edges and stitched.  Don’t forget to leave a space to turn it right side out.  I sewed around one curve and part of the other straight side, stopped, backstitched, left about a 3″ space, and then finished sewing the rest of the straight side and the other curve.

100_1894 edited


When you’re finished sewing around all of the edges it will look like this:

100_1898edited


Turn it right side out through the opening you left.  A chopstick (or “turning tool”, if you’re fancy) is really helpful for this.

100_1899edited


Press it flat and slipstitch your opening closed.  It should look something like this.  You might notice that I got lazy and didn’t leave quite a full 1/4″ around my curves, so they’re not as even as the long edges.  It’s not super obvious, but learn from my mistake and don’t be skimpy on your seam allowance.

100_1900edited


Stitch your buttonholes according to your button size and your sewing machine’s instructions.

100_1901edited


I stitched a straight seam down the center back of my belt to hold it to the garment.  Since I already had a seam there from piecing my fabric it wasn’t super obvious, but if you don’t have a seam there you might want to do something decorative like stitching a box with an X through it, stitching in the ditch next to the lining fabric or slipstitching the belt on so that your stitches won’t show.

100_1902 edited


Sew your buttons on and you’re done!  (The shadows on the romper above are my head and Jack’s head.  He was standing on a chair at the table watching the proceedings very carefully).

Adding the cuffs is even easier.  Measure the bottom of the leg opening, cut your lining fabric to that size and about 5″ wide and stitch it on.  Hem the unfinished edge of the lining.  Press the seam allowance so you have a nice, crisp seam.

100_1903edited

Flip the lining to the inside and press again, then, treating the lining and the outside fabric as one piece, hem the inseams to finish the edges.  I also handstitched the lining to the seam allowance of the outside leg seam to keep it from sagging.

100_1905 edited

I laid the romper alongside one of Jack’s old outfits to see how far I should turn the cuffs up, then pressed them to get a crisp edge.

100_1908edited


Install or hand-stitch on snaps and you’re done!

100_1909edited


Happy sewing!
-Elizabeth

Baby sewing: done!

Yesterday I finally finished and photographed the baby projects I was hoping to get done before our baby makes his or her appearance sometime in the next week or so.  Two quilts plus two little bitty outfits.

100_1917 editedYou’ve seen the quilt tops a few times now in various stages of completion, so I’ll start with the outfits.  For the boy’s romper I found this super sweet pattern by My Taylor Made on Etsy.  I made the pants version and added cuffs and the belt.  I took photos as I was adding to the pattern, so as soon as I get those edited I’ll put up a tutorial for you on adding those details to a standard romper pattern.

For the little girl’s dress and bloomers, I started with Melly Sews’ Criss Cross Dress and ruffled bloomers pattern and tutorial (available for free when you sign up for her newsletter).  I had been looking for a pinafore dress in an infant size because I don’t have an infant handy to test a self-drafted pattern.  Melly’s wasn’t quite what I was looking for (hers has the long straps come up from the front with an open back and I wanted the dress to wrap around and cross in back like tulip petals), but it was a good start.  Her version is super cute – I just had a specific design in mind and couldn’t be satisfied with anything else.  Her pattern starts at 6 month size, so I knew it was going to be a little big for what I wanted, but you can’t beat free.  🙂

I kept the pattern I adapted for the pinafore dress, so I’ll work on getting that into PDF form and making a tutorial for that, too.  I followed Melly’s instructions and pattern exactly for the bloomers except for pinking the edges of my ruffles and putting them on in wavy lines instead of straight.

I made both in about a 3 month month size in hopes that they would be small enough not to look totally huge and silly in newborn pictures but that they might still fit for a little while after we come home from the hospital.  I’m notorious for making homemade outfits for kids that only fit on the day for which they are intended and that are outgrown in two seconds, so I’m hoping that these will get some wear for the rest of the summer.

100_1915 editedSo those little bitty outfits wrap up the baby sewing for now, and at this point I’m totally ready to meet our kiddo and stop being super pregnant in the July heat.

100_1914 editedAnyone care to venture a guess as to whether we’re having a boy or girl?  Jack’s first response to whether he wants a brother or sister is “motor!” [motorcycle], but after we told him he was going to be disappointed on that front he’s been saying “gill” [girl] or “ister”.  We’ll see if he’s right!

100_1912.jpg editedDon’t forget to watch the blog and follow us on Facebook for the baby’s birth announcement with details on how to win one of these quilts!  What special projects are you working on these days?

-Elizabeth